The system provides a comprehensive list of 253 jurisdictions. Based on the users’ policies, jurisdictions with the same risk scores are grouped into country categories and each country category is assigned a risk score that is used within jurisdiction risk pillars.
When it comes to jurisdiction risk, users should first define:
- How jurisdictions are grouped in relevant country categories, and their respective risk scores;
- The risk factors that affect risk scoring (e.g. nationality, residence of UBO, jurisdiction of source of wealth, etc.…).
These settings can be configured as per the instructions below.
Step 1: Create New Country Category Groups
Users have more than one way of dividing all the available jurisdictions into different categories. For example, users can divide the countries based on risk for risk scoring purposes, and also divide the countries based on geographical location for reporting purposes.
A country category group allows users to divide all countries available into specific categories. Following the example above, users would need to have two country category groups – e.g. titled “Risk Scoring” and “Reporting”.
The system already contains a country category group titled Default Grouping that will be used as the basis for risk scoring, and that can be renamed. For Malta users, country groups will be added each year for reporting purposes (annual REQ).
In the instance users need another Group besides the ones already available on the system, they should:
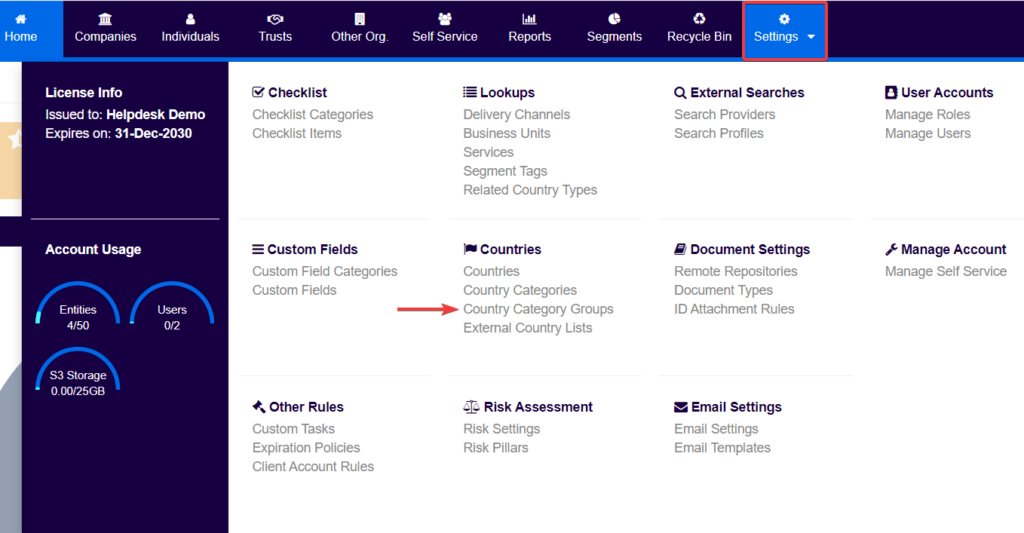
- Users first should click on Settings;
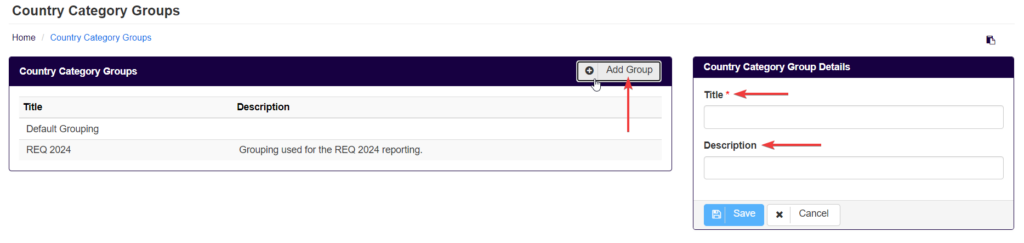
- Then click on Country Category Groups. All the country category groups configured within the system will be on display;
- Finally, users should click on Add Group and:
- Populate the Title of the Country Category Group they are creating;
- Optionally populate a description;
- Save.
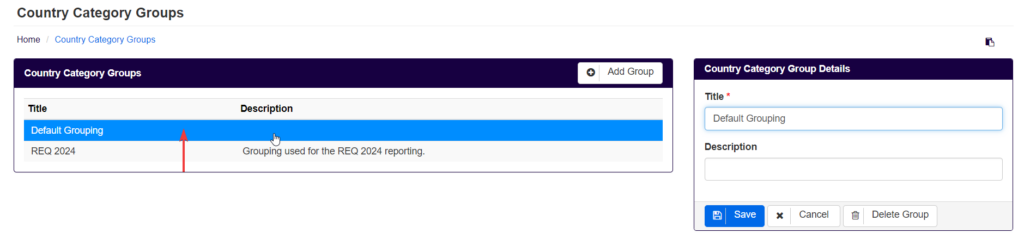
To edit an existing group, users should click on top of it, and the details widget will appear. Then, users can change the Title and Description, and click on Save.

Step 2: Connecting a Group of Country Categories to the Jurisdiction Risk Pillar(s)
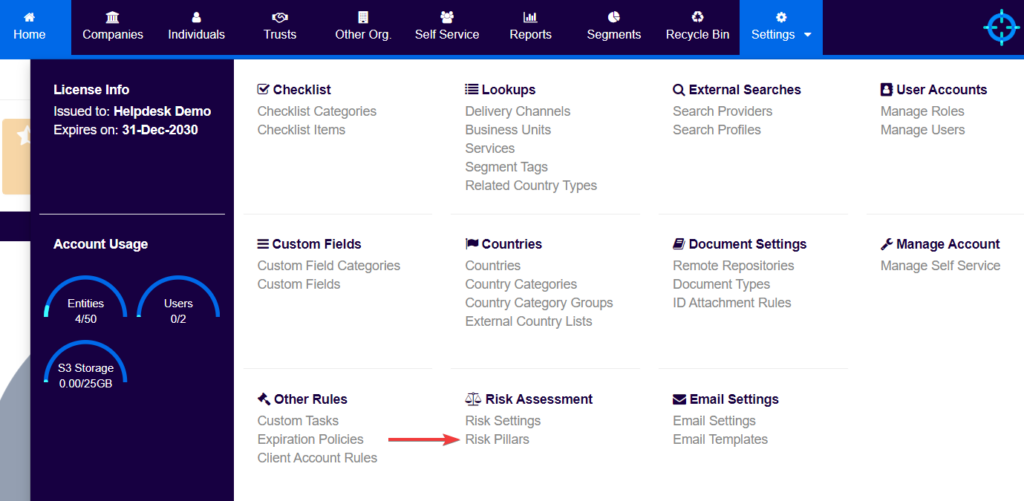
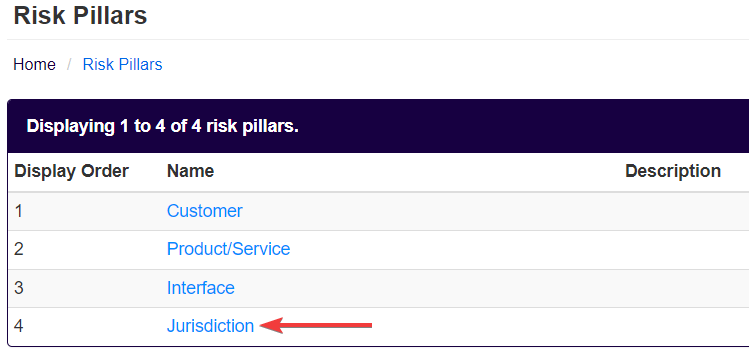
Users can assign a Country Category Group to the Jurisdiction Risk Pillar by clicking on Settings > Risk Pillars > Jurisdiction.
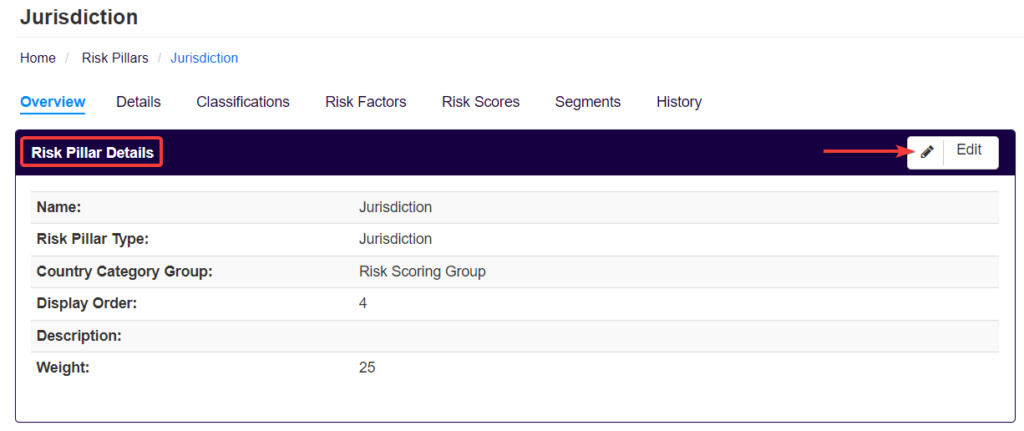
After users select the risk pillar, the Overview screen of the Jurisdiction pillar will appear. Users will the be able to edit the Risk Pillar Details, by clicking on the Edit button.
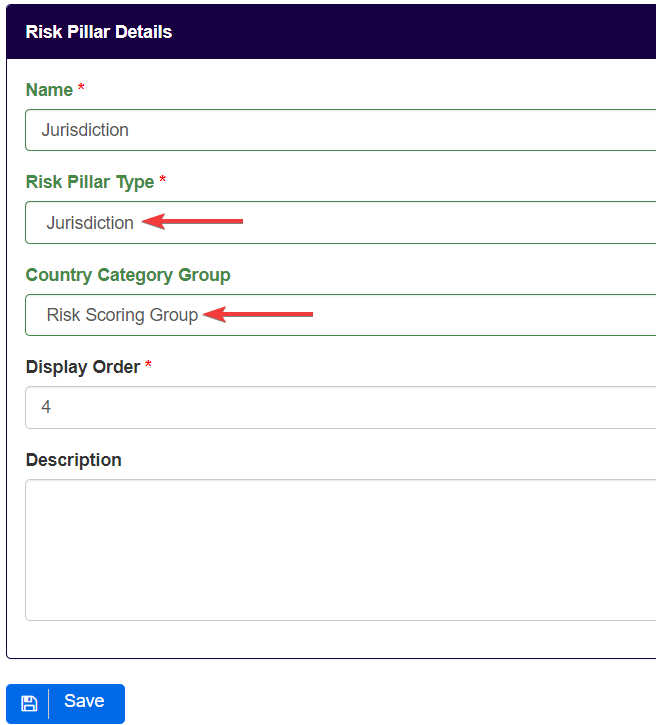
As risk pillars can be assigned a Country Category Group, users will be able to assign the group that is to be considered for CRA purposes. The Risk Pillar Type should be of type Jurisdiction so users can assigned a country category group to it.
Step 3: Create Country Categories
An unlimited number of country categories can be created in the system, with the desired denominations. As an example, the following country categories can be created:
- Low Risk Countries;
- Medium Risk Countries; and
- High Risk Countries.
Each country category can have a risk score assigned to it, as well as a risk assessment override. An override defines the minimal risk classification a client will have.
For that, users should:
- Click on Settings;
- Click on Country Categories;
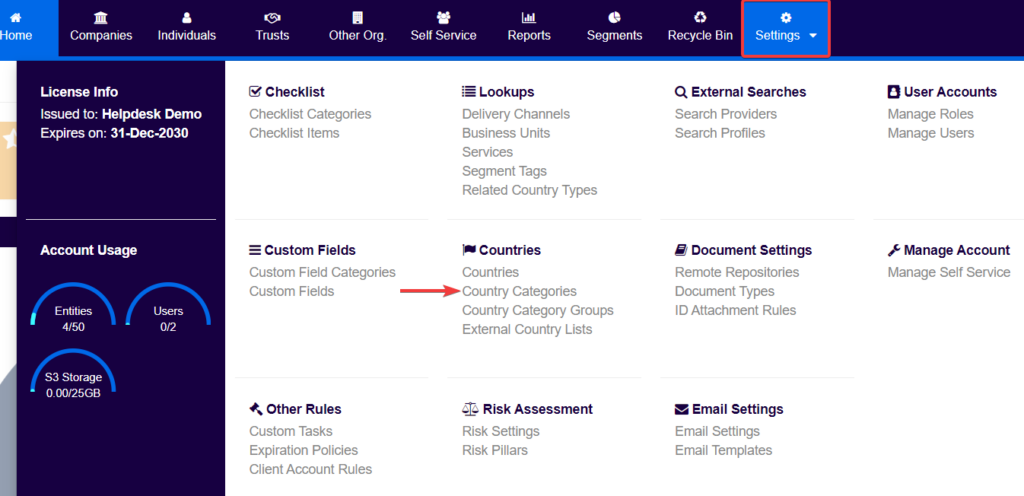
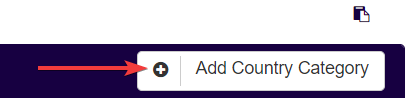
- Click on Add Country Category;
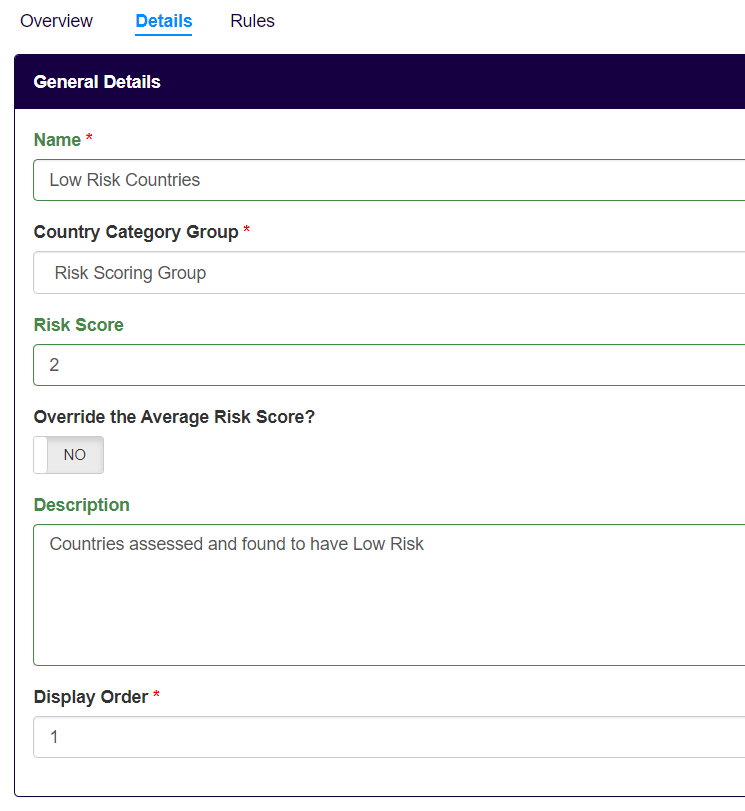
Users will then be prompted to populate the following Country Category details:
- Name;
- Assign the Country Category Group;
- Risk Score, optionally if the category group selected is used in the CRA;
- Optionally override the Average Risk Score;
- Optionally input a description;
- Define the Display Order.
Step 4: Define the Rules of the Country Category
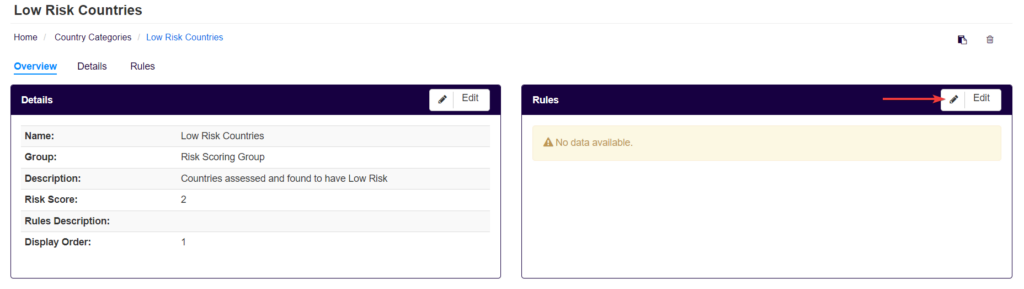
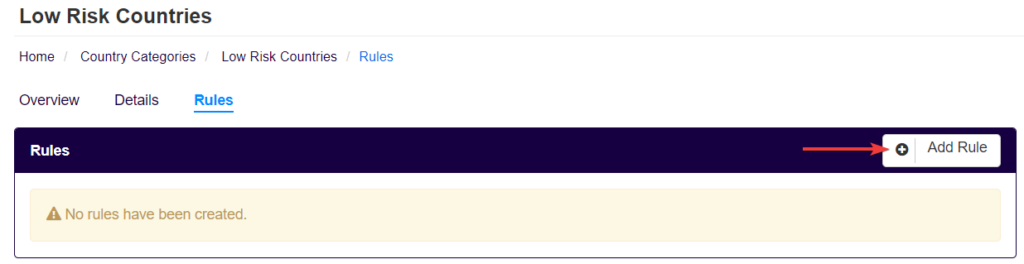
Users can add new rules or edit existing ones by clicking on a country category. Users will be directed to the overview screen of the country category selected. For a new country category, the rules on the right will be empty. To add rules, users should:
- Click on the country category;

- Click on the Edit button of the Rules table;
- Click on the Add Rule button;
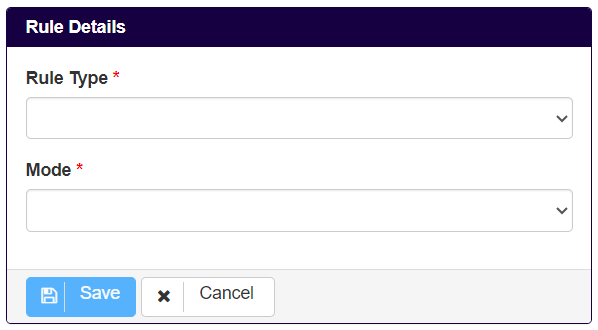
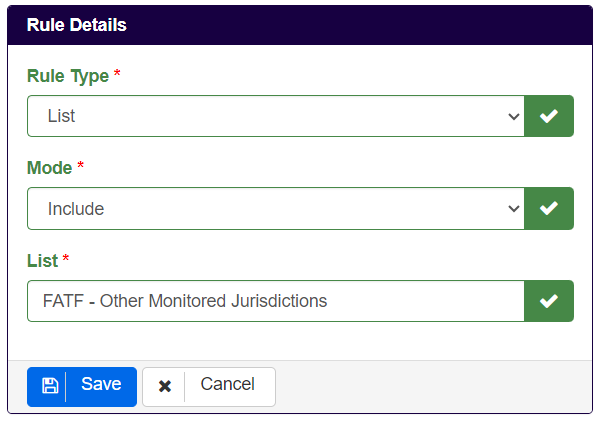
- Select the Rule Type, Mode, and List or Country, accordingly to what was selected in the Rule Type.
For each country category, a set of rules should be defined in order to determine which countries will fall within the scope of such country category. The rules available to be configured in the system are the following:
- Include a country (i.e. include an individual country, that will remain included in the risk category until it is manually removed);
- Exclude a country (i.e. exclude an individual country, that will remain excluded from the risk category until it is manually removed);
- Include an external list (i.e. include a list of countries in a particular external list); and
- Exclude a list (i.e. exclude a list of countries in a particular external list).
Working with individual countries provides the highest level of granularity, since it allows users to apply any complex jurisdictional risk assessment logic into the system. Alternatively, using external lists enables the system to automatically apply internal policies that dictate how external lists (e.g. FATF grey list – Other Monitored Jurisdictions) should affect the jurisdictional risk score of a country.

N.B. Note that each country category group will contain country category titled Other that does not define any rules but will include all countries that do not fall into one of the other country categories. This category can have a risk score assigned as well.
Step 5: Set Up Risk Factors
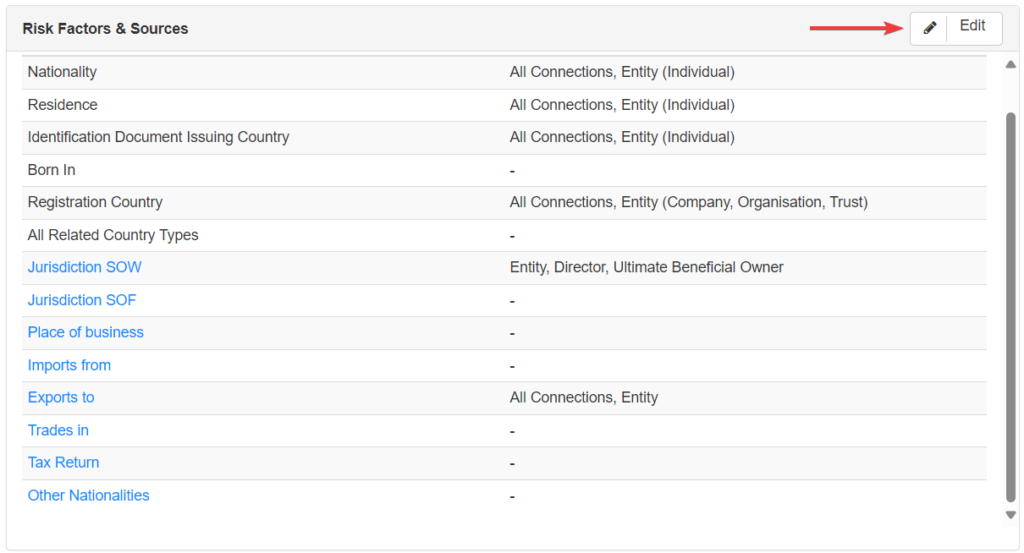
From the Jurisdiction Risk Pillar Overview screen (see Step 2 to know how to access it), users can define which Sources will be considered in the CRA for each Risk Factor. For that, users should click on the Edit button:
N.B. To add further risk factors related to Jurisdictions, users should refer to the chapter 6.1.
Users should then select the factor to which they want to add sources to affects the CRA, and then toggle Yes in the connections to be considered, as per the below.
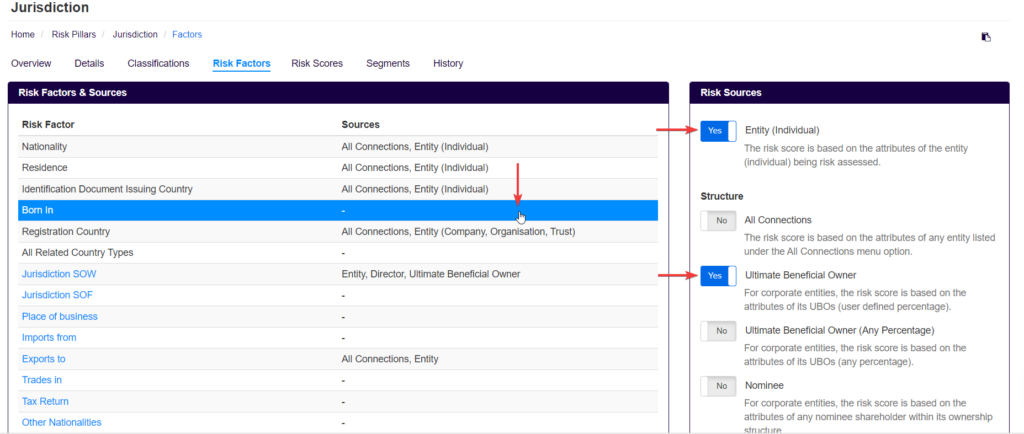
In this example, for the risk factor Born In, the risk sources Entity, and Ultimate Beneficial Owner were selected. For a serviced individual, the country where they were born will be taken into account in the CRA, as the option Entity was ticked.
For serviced companies, the country where its UBOs were born will be considered. Users can find a small explanation for each below each connection name.
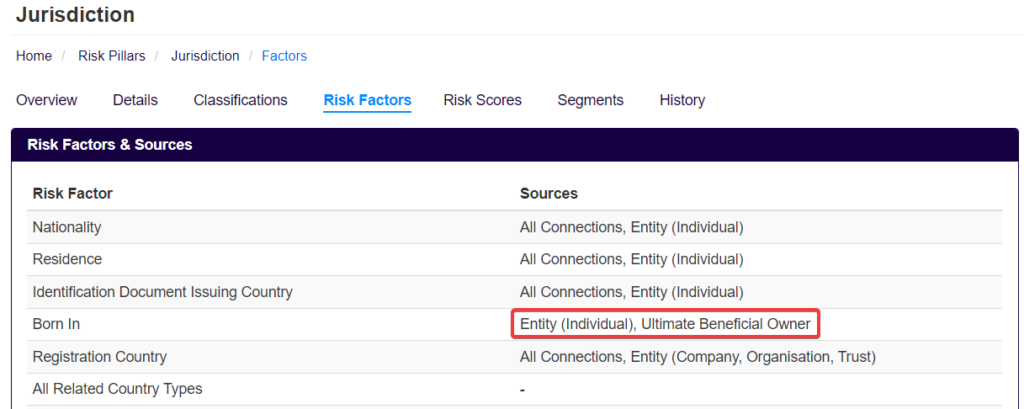
After selecting the appropriate risk sources, users should see them next to the risk factors:
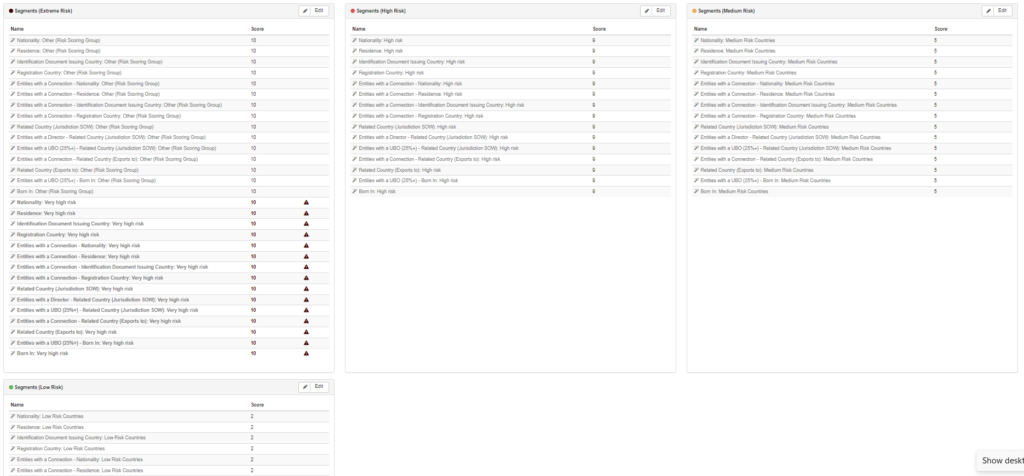
Step 6: Review Risk Rules
If users are using simplified rules, segments and risk scores should now be automatically generated as per the below: