Custom Fields allow you to define what data is to be collected for all entities. For example, you may want to collect information about PEP status, source of wealth or industry. Custom Fields can be grouped by Custom Field Categories.
Step 1
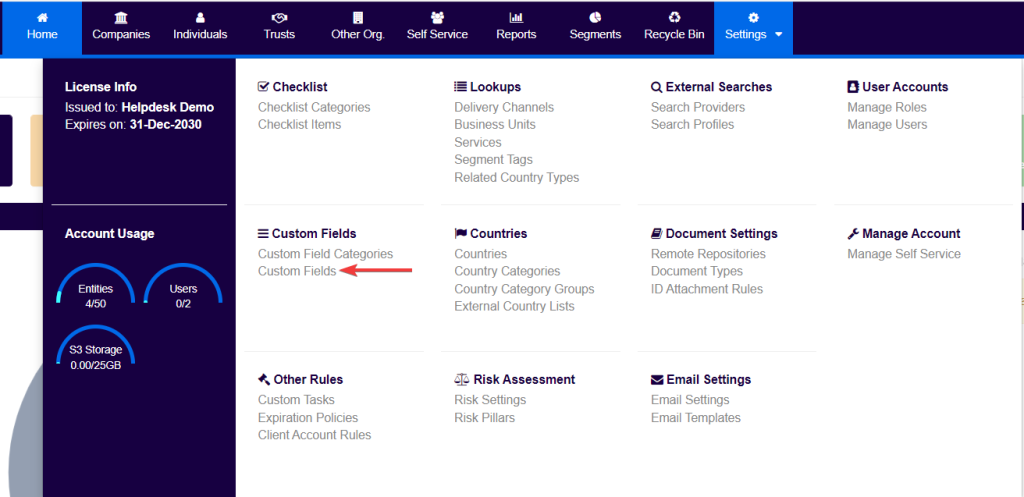
To amend or create a custom field, users should first click on the Settings menu item at the top of the screen.

Under the Custom Fields section, users should then click on Custom Fields.
Step 2
Users will now be directed to a list of all custom fields that are currently included in the system, if any are available.
To add a custom field, users should then click on Add Custom Field.

Step 3
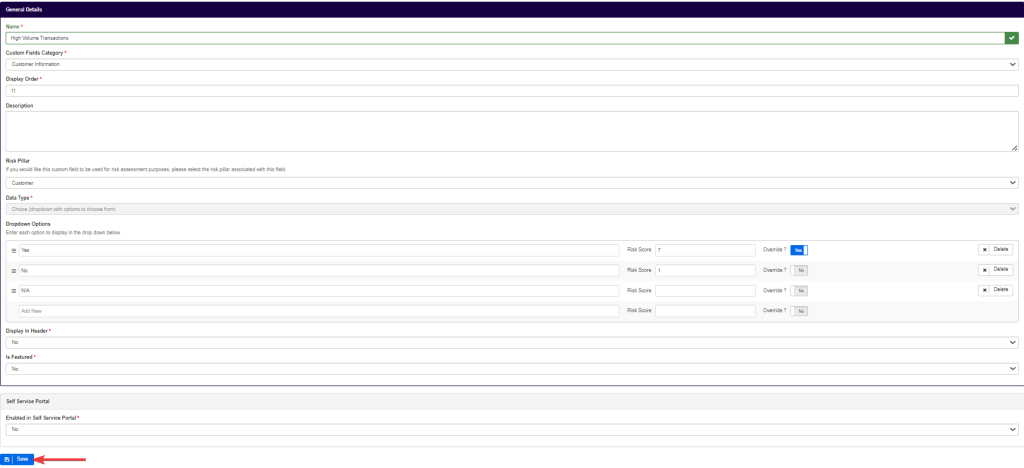
Users should then follow the below process when creating the custom field:
- Input the Name
- In this example, High Volume Transactions.
- Select the relevant Custom Field Category*
- In the below case, Customer Information
- The Display Order allows users to change where a specific custom field is shown in the list of custom fields. If there is no preferred order this number does not need to be changed.
- Under Description users can add a brief description relating to the custom field.
- Under Data Type users are able to select how data relating to this custom field should be entered. There are 7 options for Data Types:
- Yes/No;
- Choice (dropdown with options to chose from);
- Date;
- Date (with reminder);
- Number (Integer);
- Single line of text;
- Multiple lines of text.
In this example, Choice (dropdown with options to chose from) was chosen. The options added to the dropdown can later be amended by the user. If the data type selected is the type Yes/No, further options cannot be edited. The Data Type of the Custom Fields cannot be changed once these are created.
- Risk Pillar is an optional field that could be used in conjunction with simplified rules. This allows users to assign risk scores for Yes/No and Choice (dropdown with options to chose from) data types, and assign these answers to a risk pillar. Users can also decide to select the override option which establishes that a particular risk score will be the minimum risk score an entity can have.
N.B. – Prior to using this field, users should first read the guide on setting up simplified risk rules for custom fields, since there are additional steps that are required in order to ensure that risk scoring is working properly (namely setting up risk sources, which in turn would create the automatic segments).
- The field is Display in Header, by default is set to no. Changing this will allow the information entered for that custom field to be displayed next to the name of the entity at the top of the profile screen.

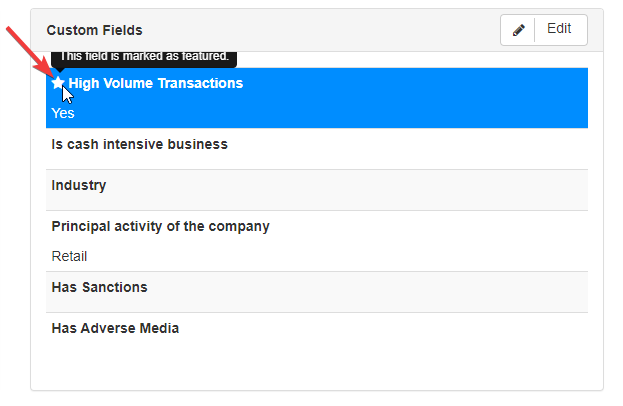
- The field Is Featured, by default is set to no. Changing this will allow the information entered for that custom field to be tagged on top of the Custom Fields’ widget within the overview panel, so such information is always in display and catches users’ attention.
- The last field is the Enabled in Self Service Portal, only applicable to environments with the Self-Service available that, by default, is set to no. Changing this will allow that particular custom field to be included in the Self-Service requests.
Users then should click on Save.
*The custom field category had already been created in the system. Should this not be created, kindly add this before adding a custom field.
Step 4
Users will then be reverted to a screen showing an overview of the custom field that was just created.
In the Rules box to the right of the screen, users should proceed to click on the Edit button.

Step 5
In the following screen users should click Add Rule. Multiple rules can be added for each custom field, for that users just need to click again on Add Rule.

Step 6
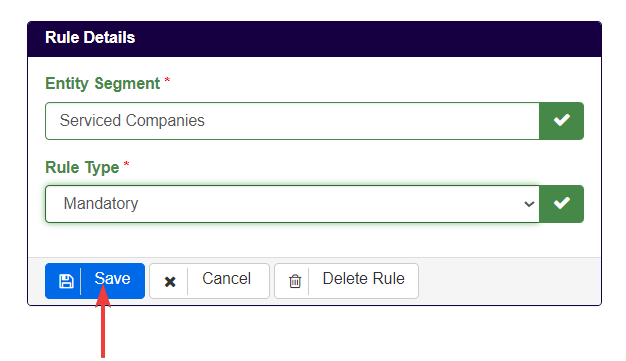
Users must now input the rules relating to the custom field in order to indicate to whom the system should make this field available and whether or not the information is mandatory to be provided. Optional custom fields will still be available for data input under the relevant entities to whom they apply, however, the system will not generate a warning if left empty.
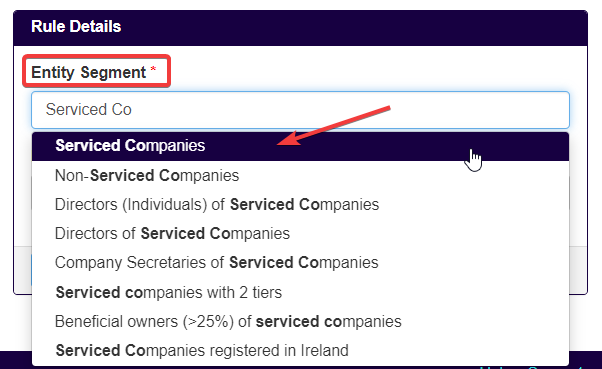
- Under Entity Segment users can search for and select the appropriate entity segment (users may want to create one if an appropriate segment does not exist).
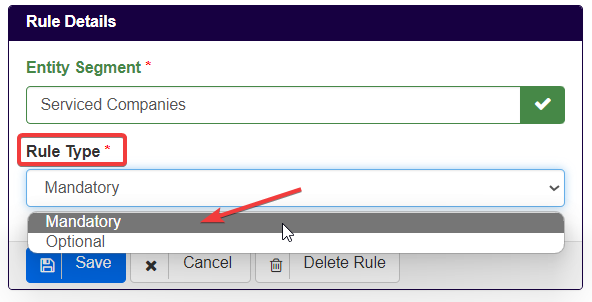
- Under Rule Type users should select between Mandatory or Optional.
- For this example, the custom field High Volume Transactions is Mandatory for Serviced Companies and Optional for Non-Serviced Companies.
Finally, users can click on Save to enable the custom field as the rules direct.