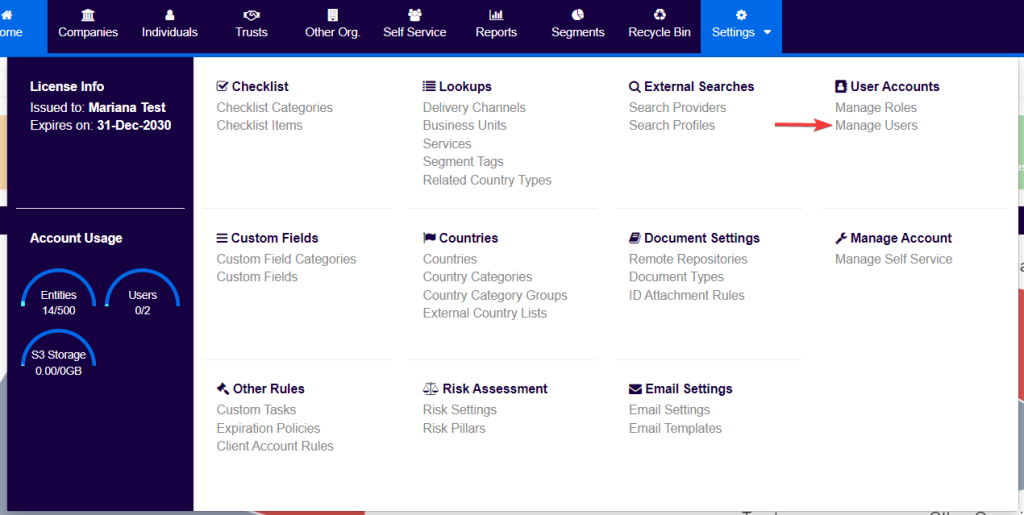
Step 1
Click on the Settings tab at the top of the screen.

Step 2
Click on the Manage Users option on the top right of the dropdown menu.
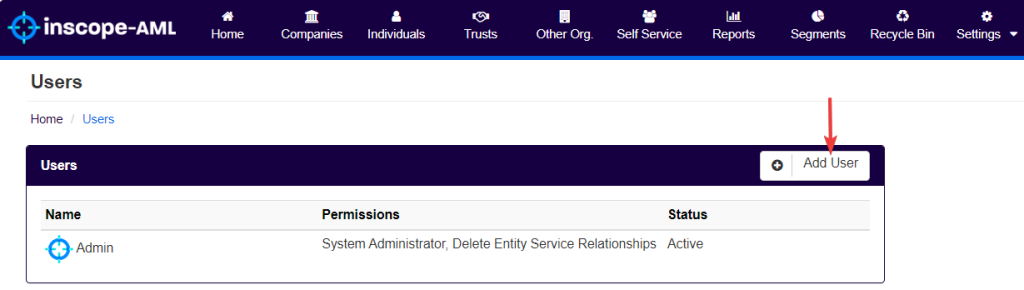
Step 3
Click on Add User button to create a new user profile.
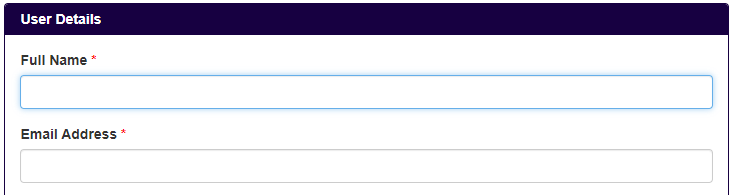
In this screen, users can enter all the information required to register a new user in the system.
In the User Details section:
- Enter the Full Name of the new user.
- Enter the Email Address of the new user.
Select the permissions to be conceded to the new user.

Further information on permission levels can be found here.
Once the permissions for the new user have been selected, hit Save on the bottom left of the User Details section.

This will notify the new user via email and they will be taken through the account setup process.