This article provides a step-by-step guide to reconfiguring Jurisdiction risk scores, using InScope’s new Simplified Rules feature.
Simplified Rules allow you to easily reconfigure various aspects of your InScope setup. As part of InScope 7.5, we’ve released the Simplified Rules feature for the Jurisdiction risk pillar, as detailed below. Further simplified risk features are upcoming in future releases.
For example, when it comes to jurisdiction risk, administrators can now define:
- The risk factors that affect risk scoring (e.g. nationality, residence of UBO, jurisdiction of source of wealth, etc…)
- How countries are grouped, the relevant categories and assigned risk scores.
Important: If the new risk scores differ significantly from the old risk scores, the system may generate a high number of Risk Assessments Due warnings.
Step 1: Disable Automatic Risk Assessments
Usually, if InScope is already configured, making changes to any of the rules will trigger risk assessments and various other warnings for any entity that falls under the related segment, as this is a fundamental change to risk rating criteria and InScope sees this as a trigger event.
In order to avoid this and ensure that automatic risk assessments are not generated while we are re-configuring the rules, we have added a new feature, that allows users to disable InScope’s automatic risk assessment.
Before going any further with this guide, we would recommend that you switch off auto risk assessment to avoid unnecessary warnings and bloated risk assessment statistics.
Step 2: Definition of UBO
When setting up simplified rules, you will be configuring InScope to apply jurisdiction risk based on the jurisdiction risk of UBOs. The system needs to understand what you mean by UBO. In its simplest term a UBO is a shareholder who directly owns shares in the company or owns shares in another company that owns shares in the client company. However, there are two additional considerations:
- What is the minimum percentage owned that needs to be considered. This minimum UBO percentage value is typically set to 25% but in your risk policy you may want to consider lowering this value so that risks from UBOs with less than 25% are also taken into account.
- In terms of complex structure charts involving trusts and organisations how is the concept of “UBO” inherited. For example, if a client company is owned by a trust which has a settlor, beneficiary, protector and trustee, are all UBOs of the settlor, beneficiary, protector or trustee considered as UBOs of the client company. In most cases, our clients select the option of setting the following as UBOs: Beneficiary (Trust), Beneficiary (Organisation), Settlor, Founder, Controller.
These settings can be configured as follows:
- Open to Settings > Risk Settings. This should display the Definition of UBO widget as shown below.
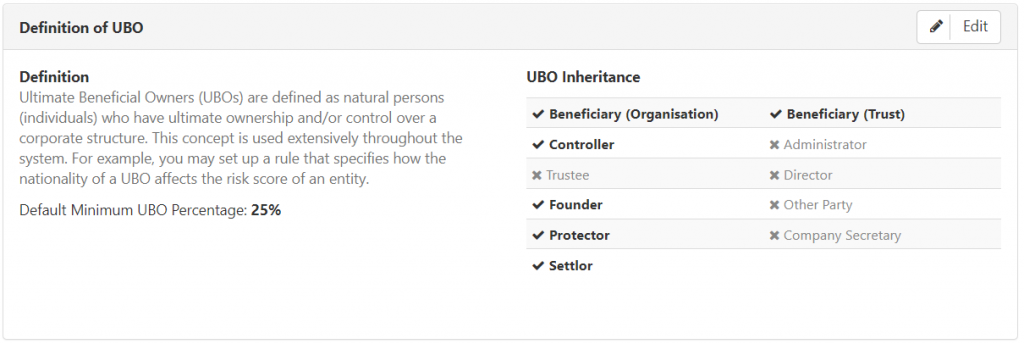
- In order to change any of these settings, you simply need to click ‘Edit’ in the top right corner, which will take you to the following screen:
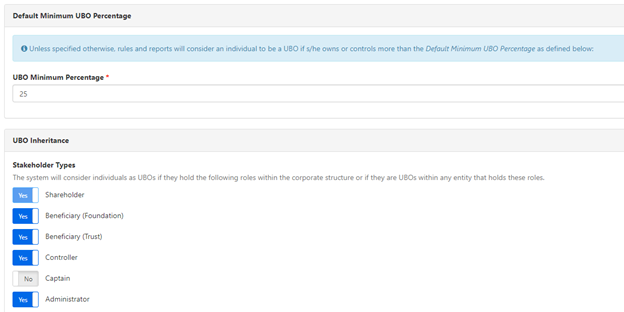
- Should you wish to change the percentage ownership at which a shareholder is considered an Ultimate Beneficial Owner, you simply need to alter the UBO minimum percentage box and hit ‘Save’ at the bottom of the page.
- Similarly, should you wish to change which Stakeholder Types are considered UBOs, simply flip the switch to ‘Yes’ for the Stakeholder to be considered or ‘No’ to discount the relevant Stakeholder; and click ‘Save’.
Step 3: Preparing your Jurisdiction Risk Scores
Before you attempt to fully re-configure your Jurisdiction risks, you need to ensure that you have an updated policy relating to how you are handling Jurisdiction risk, particularly considering recent regulatory actions and focus.
Part of this policy would include defining a risk score for each country, based on individual risk assessments of the jurisdictions you deal with. Countries sharing the same risk score can be grouped into categories, such as High/Medium/Low risk or in any way you should so wish to categorize them.
Step 4: Create a new country category group
A country category group allows you to divide all countries in the world into specific categories. To create a country category group, you need to:
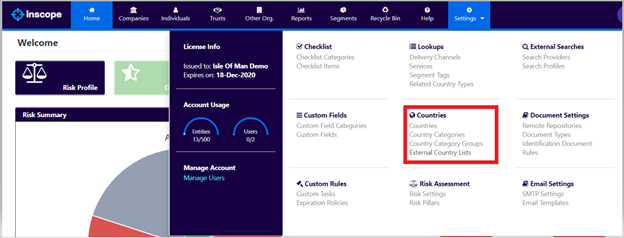
- Go to Settings > Country Category Groups
- Select Add Group, in the top right of the Country Category Groups widget
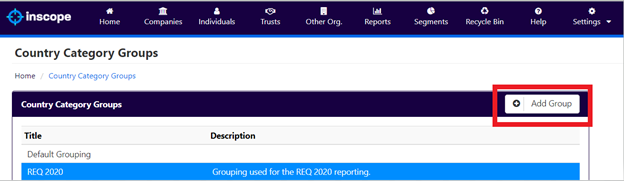
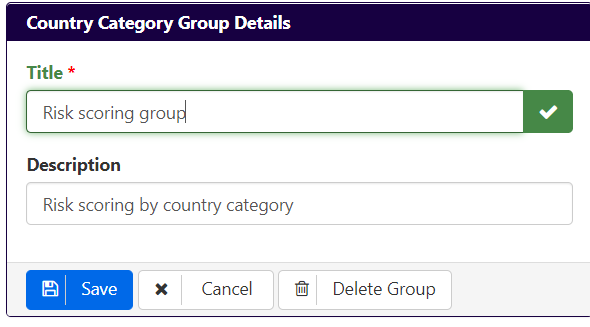
- This will present you with the following widget:
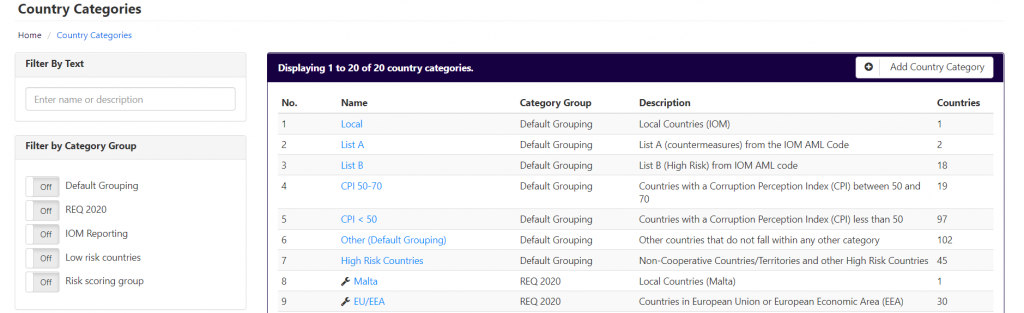
- Now in order to populate this group, we need to define country categories to place within it. In order to do so, you need to go to Settings > Country categories

- Once here select ‘Add Country category’ in the top right once again.
- This will present you with the following screen:
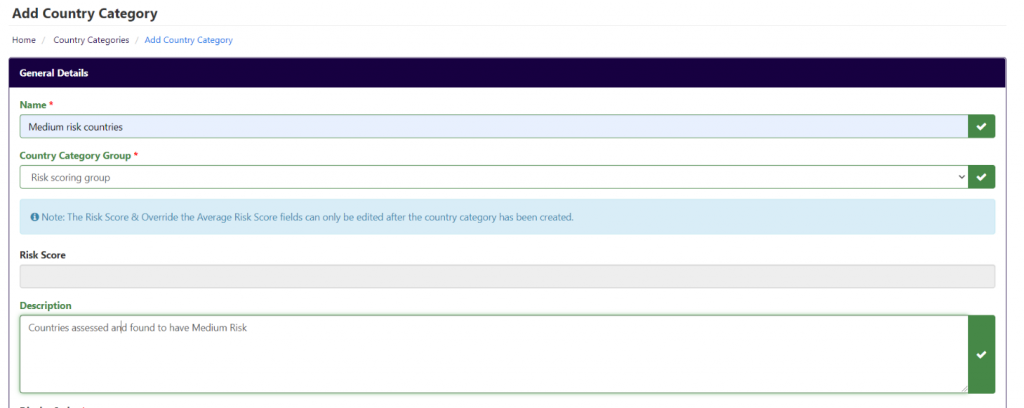
You will need to enter the name, select the country category group created previously and add a description if you would like. Then select ‘Save’ at the bottom of the page.
NB: The risk score can only be added at the end of this process.
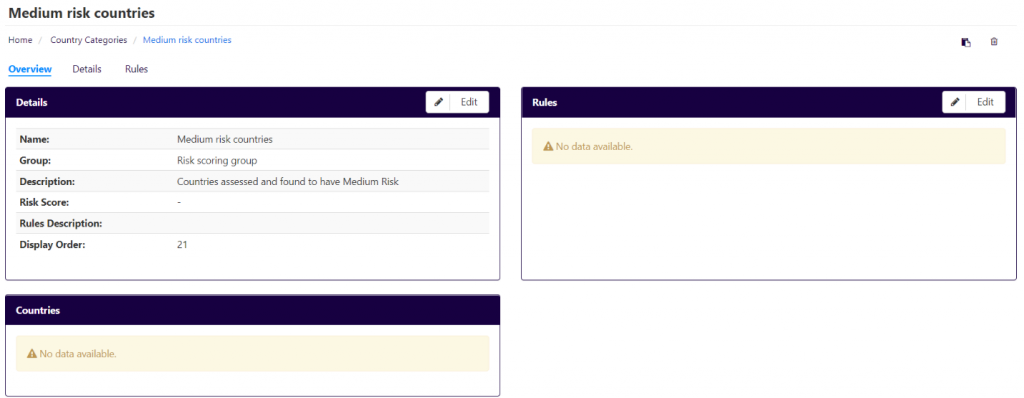
- Now you will come to the overview of the country category.
You will notice that the rules on the right are empty. Click ‘Edit’ from the Rules widget to edit the rules.
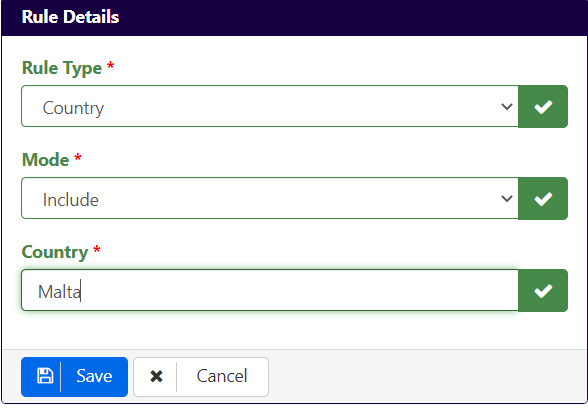
- In order to add countries to select ‘Add rule’ at the top right of the screen., this will display the following widget. To include a single country, you need to select ‘Rule type’ Country and Mode ‘Include’, followed by the country in question and then pressing ‘Save’.
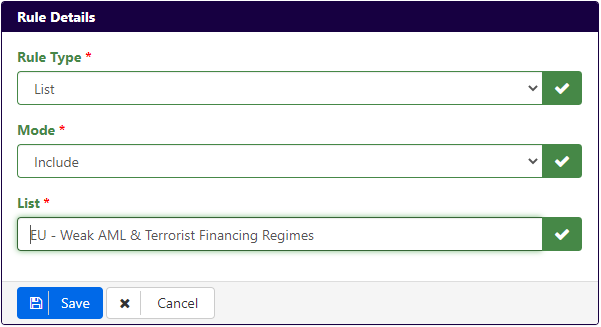
- You will need to do this for all countries that you want to include in the list and apply the associated risk rating to. You may also want to bulk add multiple countries from one of the many lists maintained by InScope. To do so, you will set choose ‘Rule Type’ List and then select a list. For example, you may want to add all countries on EU Weak AML List to your High Risk Countries category:
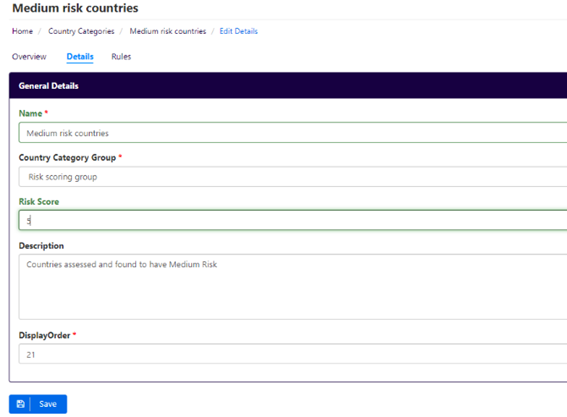
- Once you’ve added all the countries to the country category, you can add a risk score, which will apply this score to all jurisdiction risk factors based off this country. This can be found again under Settings > Country Categories > Country category created earlier > Details
Step 5: Connecting a group of country categories to the jurisdiction risk pillar
- You can find risk pillars under Settings > Risk Pillars.
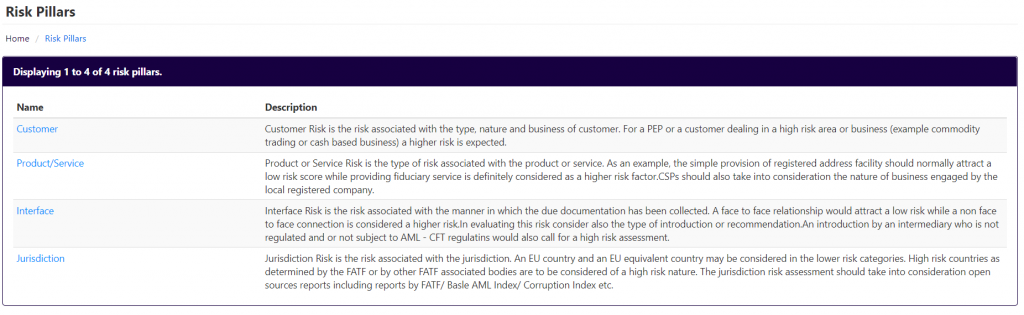
- Risk Pillars can be assigned a Risk Pillar type. A Jurisdiction risk pillar type can be configured using simplified rules. Select the jurisdiction risk pillar from the list above to open the Jurisdiction Risk Pillar dashboard as shown below:
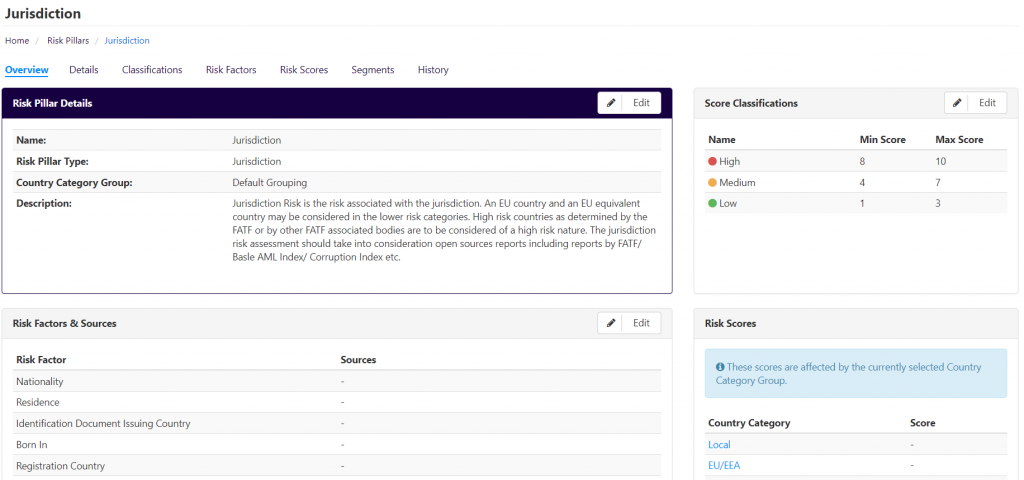
- Make sure that the Risk Pillar Type shown in the Risk Pillar Details widget, is set to Jurisdiction as shown on the screen below.
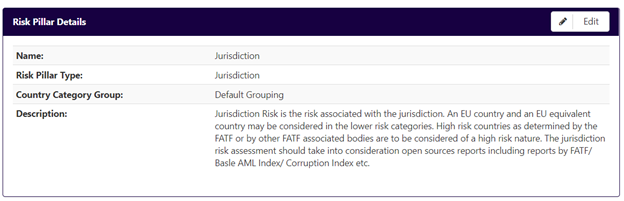
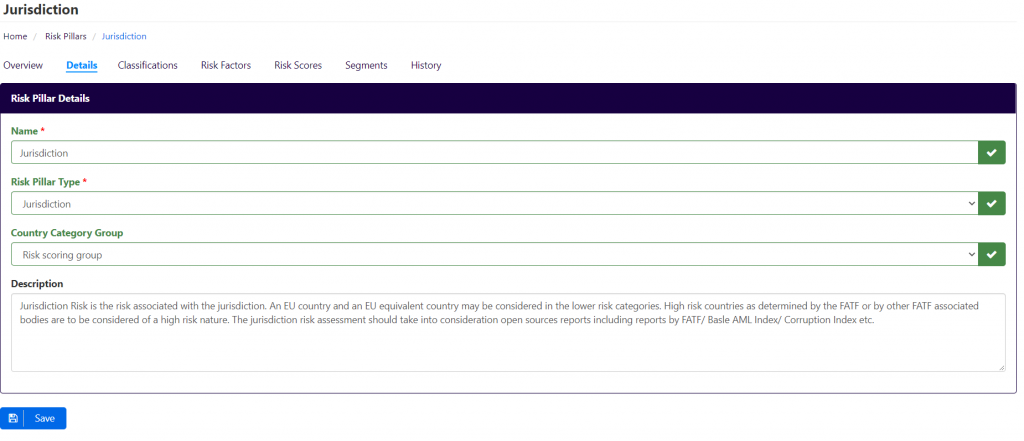
- Click on the Edit button and set the Country Category Group to the group created in step 4. This instructs InScope to apply the risk scores associated with the country categories you created earlier, to this risk pillar:
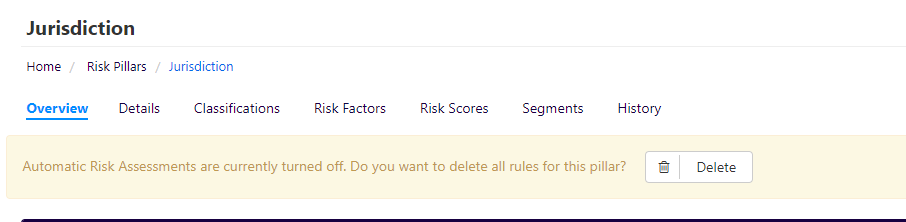
Before going any further, we would recommend that you delete all existing risk scores associated to the risk pillar so that going forward only the risk scores associated to your Country Category group are applied. This option is only available if you have disabled the Automatic Risk Assessments as described earlier. To delete all risk pillar rules, select the delete button shown in the yellow bar at the top of the screen:
Step 7: Set up Risk Factors
- From the Jurisdiction Risk Pillar dashboard, click on Risk Factors. This will open up a screen as shown below. Now you can configure the Factors, which are the various places InScope will take risks from in order to work out the risk from the appropriate source.
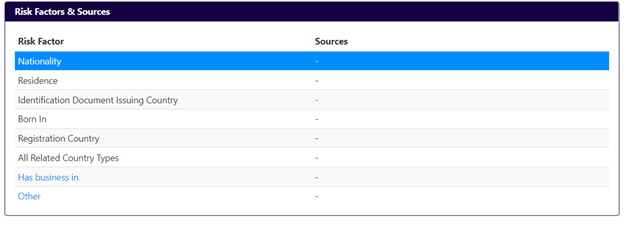
- Select a factor that you want to consider and then tick which entities/entity factors or associations are going to affect the score, as per the below.
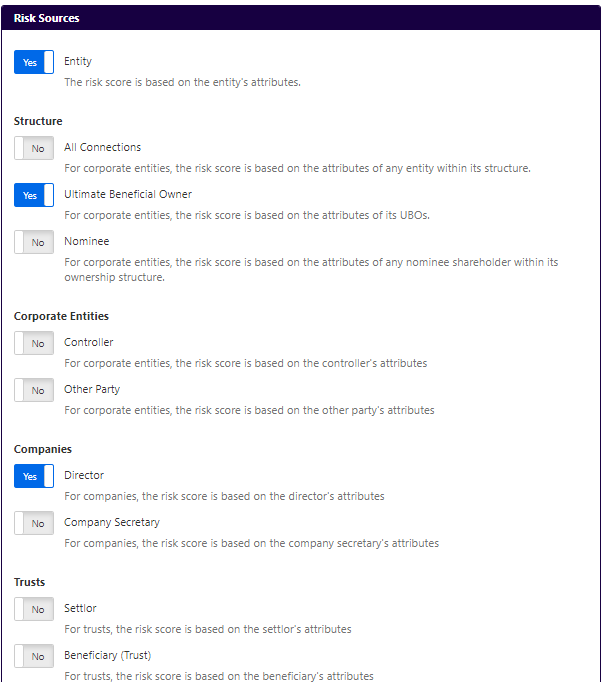
The Risk Sources allows you to define how nationality of individuals effects risk ratings along the Jurisdiction risk pillar. For example, in this case we have selected “Entity”, “Ultimate Beneficial Owner” and “Director”. For serviced individual, the nationality of the individual will be taken into account (since we ticked “Entity”). For serviced companies, the nationality of its UBOs and directors will be considered. There is a small explanation for each, however, please contact support if you have any questions related to Risk Factors.
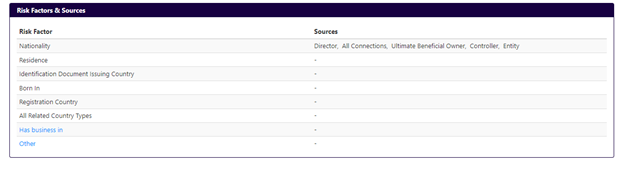
- After you have done this you should see the Factors listed next to the risk source:
Step 8: Re-enable Simplified Rules
The above steps will generate rules automatically based on the Risk Source and Factors associated. In order to apply these changes across your InScope environment you will need to re-enable automatic risk assessments (from Settings > Risk Settings) as shown above. InScope will then go through all entities to determine if there are any changes in recommended risk scores. If your new jurisdiction risk scores are very different from the risk scores that were set up in InScope, you may generate a number of risk assessment due warnings.